
This page was last updated on January 26th, 2025.
One of the main reasons why I opted for the ROCK Pi 4A for my home server was that it runs fine with only (!) free software. So as bootloader I want to use Das U-Boot without any binary blobs. Here I wrote down how I installed U-Boot (mainline) first on a microSD card and then the soldered SPI flash.
Boot from microSD card
Originally I wanted to use the pre-built SD card installer image for the board provided by Debian. This image includes U-Boot and is part of Debian’s main archive area, so it must comply with the DFSG and thus be free software. See the last few paragraphs of this section to find out why this SD card image turned out not to be a real option for me.
As explained in the README.concatenateable_images file I have to download a device-specific part (firmware.rock-pi-4-rk3399.img.gz) as well as a device-independent part (partition.img.gz) and then decompress and concatenate them.
~$ wget https://deb.debian.org/debian/dists/bookworm/main/installer-arm64/current/images/netboot/SD-card-images/firmware.rock-pi-4-rk3399.img.gz
~$ wget https://deb.debian.org/debian/dists/bookworm/main/installer-arm64/current/images/netboot/SD-card-images/partition.img.gz
~$ zcat firmware.rock-pi-4-rk3399.img.gz partition.img.gz > sd_card_image.img
Now I use lsblk before and after I put in my microSD card to find out to which device file it is mapped (in my case that is /dev/sda), then I unmount all possibly mounted partitions and write the image. Be aware that after these steps all data on the microSD card will be lost.
~$ lsblk
~$ sudo umount /dev/sda?*
~$ sudo dd if=sd_card_image.img of=/dev/sda
~$ sync
Then I just have to insert the microSD card into my ROCK Pi 4 and connect the monitor, my keyboard and the AC adapter. The bootloader works as expected and Debian Installer starts. I could use it to install my root file system to my microSD card, probably to an eMMC (I didn’t try that, I don’t have one), to some USB mass storage device or an NVMe M.2 SSD. The bootloader however would still be on my microSD card and so I would have to keep it inserted… But I can’t.
As I wrote in my last post I’m planning to use my ROCK Pi 4 as a home server with an aluminum housing and an M.2 extension board since I want to place my NVMe M.2 SSD inside that housing. In this picture you can see the microSD card inserted before mounting the M.2 extension board on top of the ROCK Pi 4:
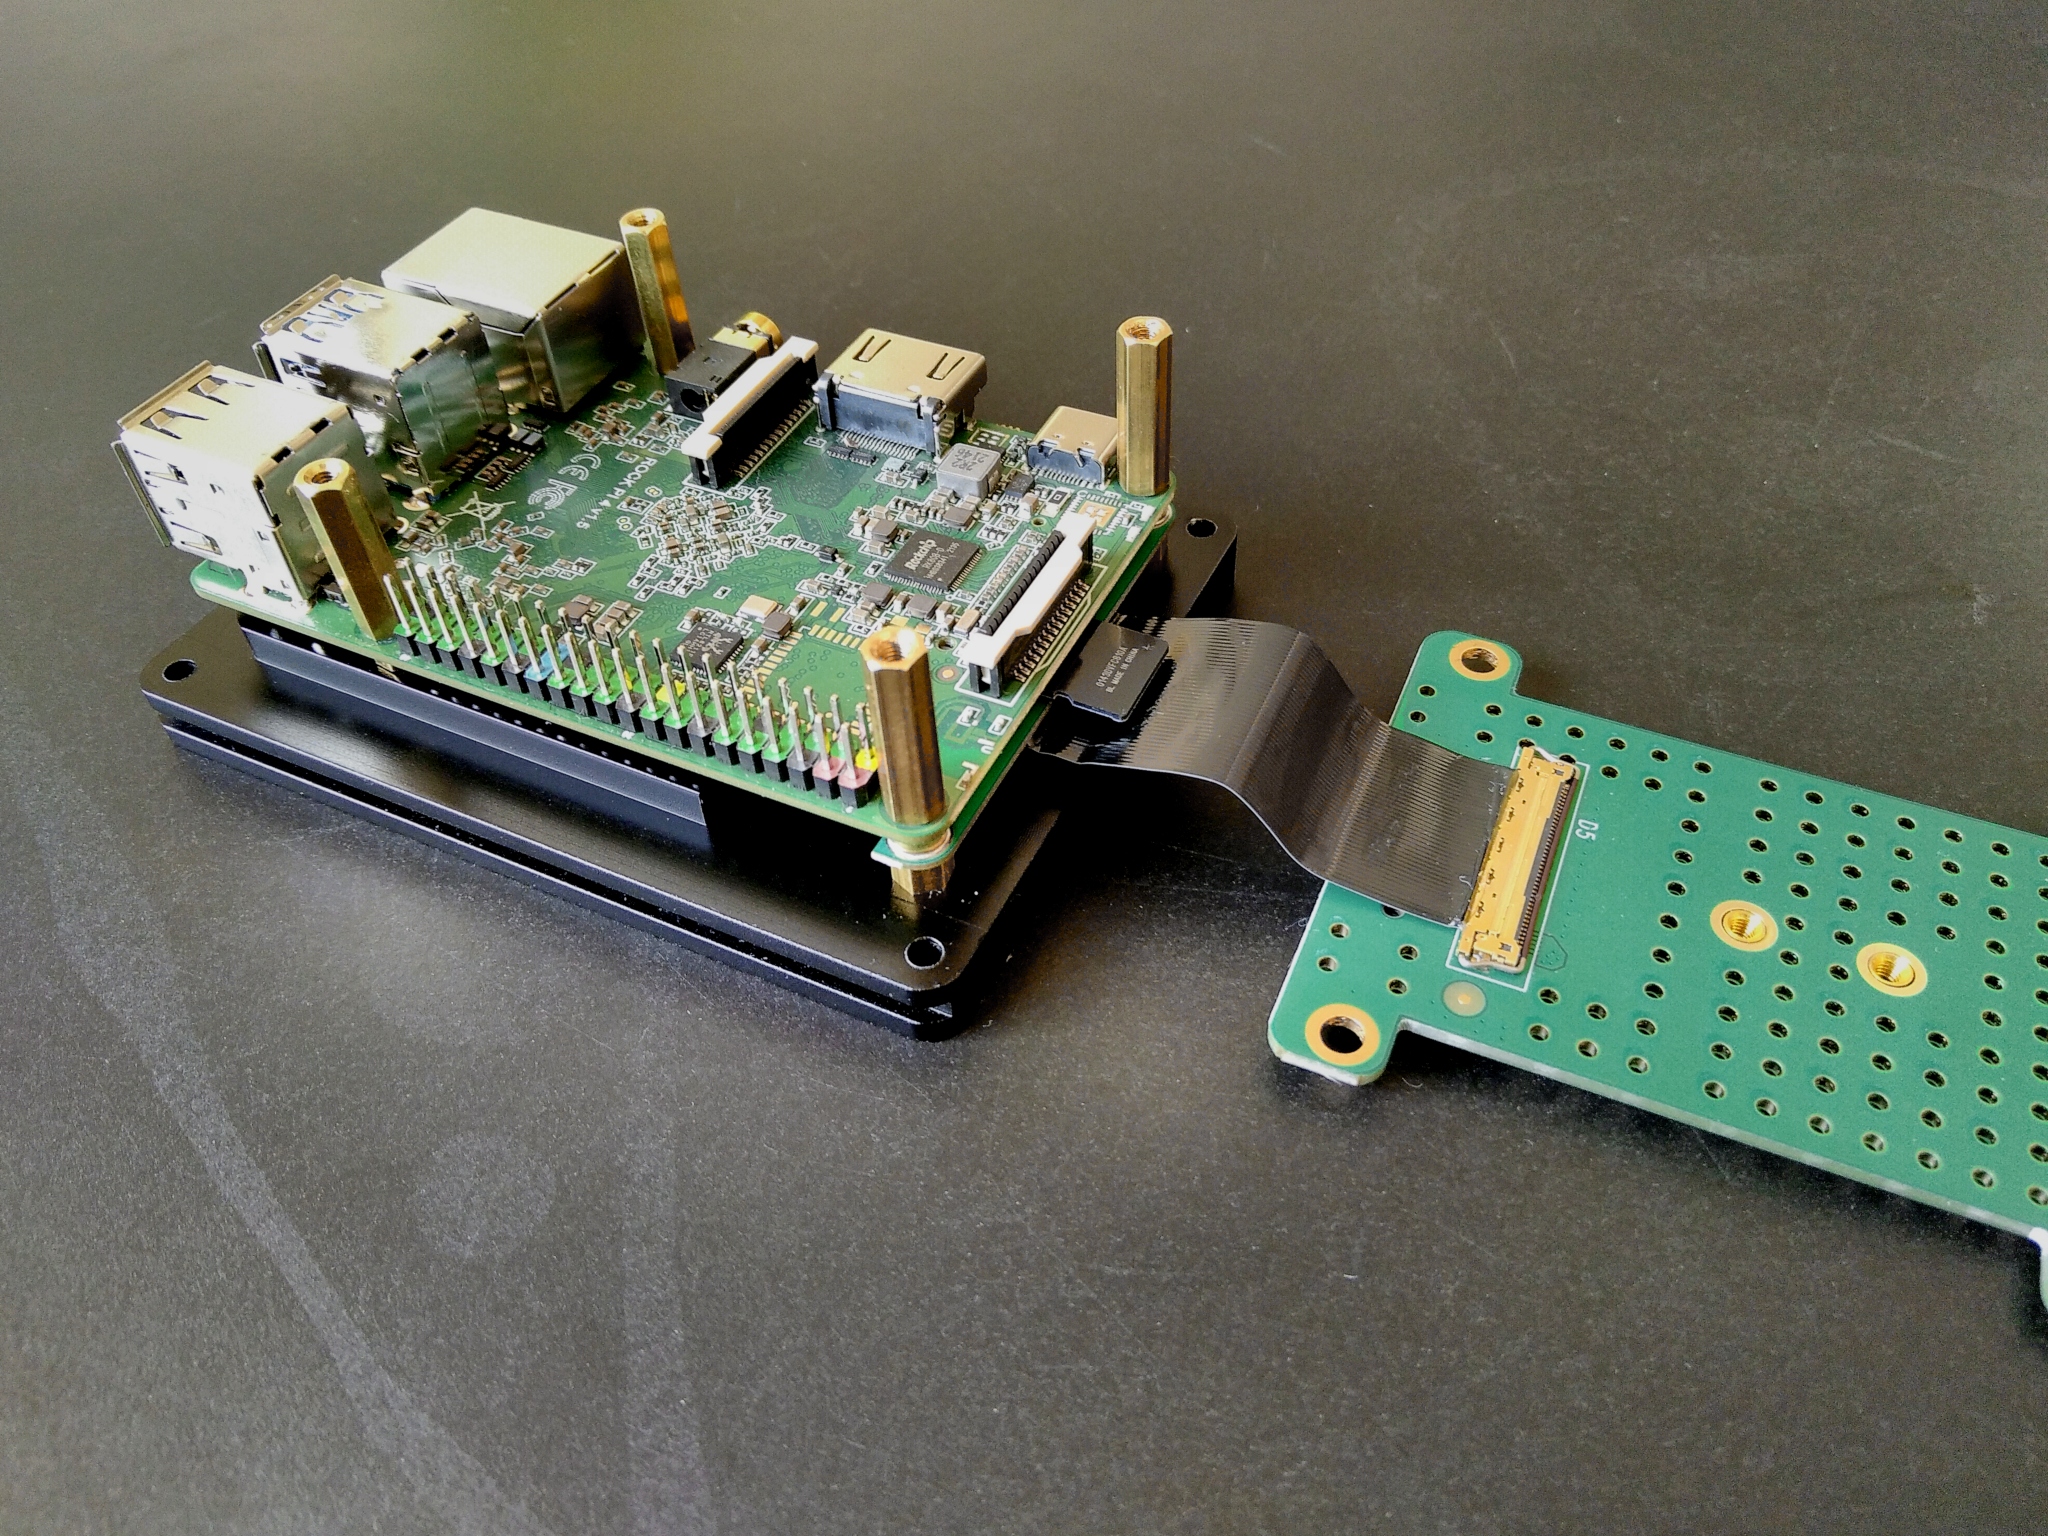
Now when I put the M.2 extension board on the standoff bolts with the microSD card inserted I can’t mount the aluminum part with the walls of the housing. And when I mount it without the microSD card inserted the ribbon cable covers the microSD slot…
So I definitely need another boot option. After looking at the Rockchip wiki I realized that I had two remaining options: SPI flash and eMMC. I decided to make use of the included SPI flash.
Boot from SPI flash
I couldn’t find a software project that provides an easy way to make use of the SPI flash of the ROCK Pi 4 with only free software. Armbian does provide an easy way indeed, but unfortunately the project’s builds depend on binary blobs. So I’m going to build U-Boot myself. The official U-Boot documentation, in this context especially the document for Rockchip supported boards, is really helpful.
Before I begin I have to get all the necessary tools. Working with Debian-based PureOS I use apt to get the required packages:
~$ sudo apt install build-essential gcc-aarch64-linux-gnu gcc-arm-none-eabi bison flex swig libncurses-dev libssl-dev uuid-dev libgnutls28-dev python3-dev python3-setuptools python3-pyelftools gitThe first step is to build Boot Loader stage 3-1 (BL31) from the TrustedFirmware-A (TF-A) project which is required when building an U-Boot image for the ROCK Pi 4. I start by creating a directory for the build process and changing into it, then I create a shallow clone of TF-A v2.11 and change into the new subdirectory:
~$ mkdir uboot-rockpi4
~$ cd uboot-rockpi4
~/uboot-rockpi4$ git clone --depth 1 --branch v2.12 https://review.trustedfirmware.org/TF-A/trusted-firmware-a.git
~/uboot-rockpi4$ cd trusted-firmware-a
The source code includes some binary files with unknown licensing. I follow the Debian project and simply remove these files before building the BL31 image:
~/uboot-rockpi4/trusted-firmware-a$ find -name \*.bin -exec rm -v {} \;
~/uboot-rockpi4/trusted-firmware-a$ make CROSS_COMPILE=aarch64-linux-gnu- PLAT=rk3399 bl31
~/uboot-rockpi4/trusted-firmware-a$ cd ..
After that I create a shallow clone of U-Boot v2024.10 and change into the new subdirectory:
~/uboot-rockpi4$ git clone --depth 1 --branch v2024.10 https://source.denx.de/u-boot/u-boot.git
~/uboot-rockpi4$ cd u-boot
Now I ensure that the U-Boot build process can find the BL31 image, then I use the configuration template for the board and use make menuconfig to generate the configuration file for the build process:
~/uboot-rockpi4/u-boot$ export BL31=../trusted-firmware-a/build/rk3399/release/bl31/bl31.elf
~/uboot-rockpi4/u-boot$ make rock-pi-4-rk3399_defconfig
~/uboot-rockpi4/u-boot$ make menuconfig
User configuration of U-Boot is done by using environment variables (I’ll use them later, see below). On the ROCK Pi 4 by default customized environment variables are stored in an MMC device (eMMC or microSD card). Since I won’t use such a device I have to make sure my changes are stored in SPI flash.


If you want to be able to stop autoboot with a USB keyboard you have to enable the usage of the environment variable preboot and set it to it’s default value usb start. I won’t enable it because it adds a delay of some seconds to my boot process and I’ll use a serial console anyway.


Now let’s build U-Boot:
~/uboot-rockpi4/u-boot$ make CROSS_COMPILE=aarch64-linux-gnu-My plan is to use the U-Boot command line to install the SPI boot image, so I write an U-Boot image that boots from a microSD card and then copy the SPI boot image to that same microSD card.
First I use lsblk before and after I insert the microSD card to make sure I use the correct device file (in my case it’s /dev/sda). After that I unmount all possibly automounted partitions. Be aware that after the next steps all data on the microSD card will be lost. I create a GPT disk label, a new partition and then build a file system on that partition. I’ll use this partition for the SPI boot image, note that it starts at sector 32768 to leave enough space in front of it for the U-Boot image that boots from the microSD card.
~/uboot-rockpi4/u-boot$ lsblk
~/uboot-rockpi4/u-boot$ sudo umount /dev/sda?*
~/uboot-rockpi4/u-boot$ sudo parted /dev/sda mklabel gpt
~/uboot-rockpi4/u-boot$ sudo parted /dev/sda mkpart noname ext4 32768s 100%
~/uboot-rockpi4/u-boot$ sudo mkfs.ext4 /dev/sda1
Now I copy the SPI boot image to the microSD card. For that I mount the partition I just created, copy the image and then unmount the partition again.
~/uboot-rockpi4/u-boot$ sudo mkdir /media/sdcard
~/uboot-rockpi4/u-boot$ sudo mount /dev/sda1 /media/sdcard
~/uboot-rockpi4/u-boot$ sudo cp u-boot-rockchip-spi.bin /media/sdcard/
~/uboot-rockpi4/u-boot$ sudo umount /media/sdcard
~/uboot-rockpi4/u-boot$ sudo rmdir /media/sdcard
Finally I write the U-Boot image that boots from the microSD card:
~/uboot-rockpi4/u-boot$ sudo dd if=u-boot-rockchip.bin of=/dev/sda seek=64
~/uboot-rockpi4/u-boot$ sync
Let’s put the microSD card into the ROCK Pi 4, connect the USB to TTL serial cable (see serial console) and then the AC adapter. U-Boot starts and looks for a bootable OS but won’t find one. After that I can use the command line to flash the SPI boot image like this:
=> sf probe
=> load mmc 1:1 $kernel_addr_r u-boot-rockchip-spi.bin
=> sf update $fileaddr 0 $filesize
I can verify that U-Boot is installed on the SPI flash by removing the microSD card and then using the reset command (or by simply disconnecting and reconnecting the AC adapter). U-Boot boots from SPI flash now, it looks for a bootable OS but won’t find one and after that drops to the shell again.
Now I use the command line to edit three environment variables to speed up the boot process. I want U-Boot to only search for a bootable OS first on my NVMe SSD and then a storage device attached via USB. I only want to use bootmeth script (since that is what I get when I install Debian with the SD card installer, see below). And I don’t want U-Boot to wait two seconds for user input to stop autoboot, so I disable boot delay. Finally I save the customized environment to SPI flash.
=> env set boot_targets "nvme usb"
=> env set bootmeths "script"
=> env set bootdelay 0
=> env save
To install my OS I connect my NVMe SSD, write the Debian SD card installer image to a USB flash drive (see above), connect it to my ROCK Pi 4 and use the reset command to boot the Debian Installer. By the way, it doesn’t matter that the SD card image includes U-Boot, it will still be loaded from SPI flash.
You can also use another arm64 Debian installer image like the netinst image. I simply prefer the SD card installer image because it doesn’t install UEFI, instead a simple U-Boot specific script will be used to load the kernel. In this case the kernel will use its own devicetree for the board, whereas in case of the Unified Extensible Firmware Interface it will get handed over the devicetree used by U-Boot.
So with the U-Boot script I don’t have to touch the bootloader to get an up to date devicetree for the OS. However, if I ever wanted to update the bootloader of my running system I would do it like this:
Update the bootloader
I have a second board, so I can test my U-Boot builds before writing them to the SPI flash of my home server. After testing I use the command flashcp provided by the Debian package mtd-utils (which is already installed if you used the Debian SD card installer image) to update the bootloader. Note: This only works with a linux kernel version ≥ 6.6.
First I copy the U-Boot SPI boot image to my ROCK Pi 4. Then I use lsmtd to make sure I use the correct device file for the SPI flash (in my case it’s /dev/mtd0). After that I erase all blocks of the SPI flash (by using the -A option for the flashcp command) and write the SPI boot image.
~$ sudo lsmtd
~$ sudo flashcp -Av u-boot-rockchip-spi.bin /dev/mtd0